Shopify has provided a marketplace for businesses of all sizes to sell their products. Small brands can use this platform to gain revenue by creating online stores. But how to start a Shopify store as a beginner? Can everyone join this marketplace and start selling online?
In this article, we will provide a step-by-step guide for creating an online store on Shopify. So, if you are ready to grow your business with e-commerce marketing and increase your sales, make sure to read this blog.
How To Start A Shopify Store In 8 Simple Steps?
Creating an online store on Shopify is not difficult and is one of the best online business ideas. You can easily join this platform to increase your sales and customers. Here is how to start a Shopify store in 8 simple steps.
Step One: Create Your Account
Shopify offers a 3-day free trial to create your online store and check the features. Here is how to start a Shopify store for beginners
- Check the Shopify website and click the ‘Start free trial’ button at the top of your screen.
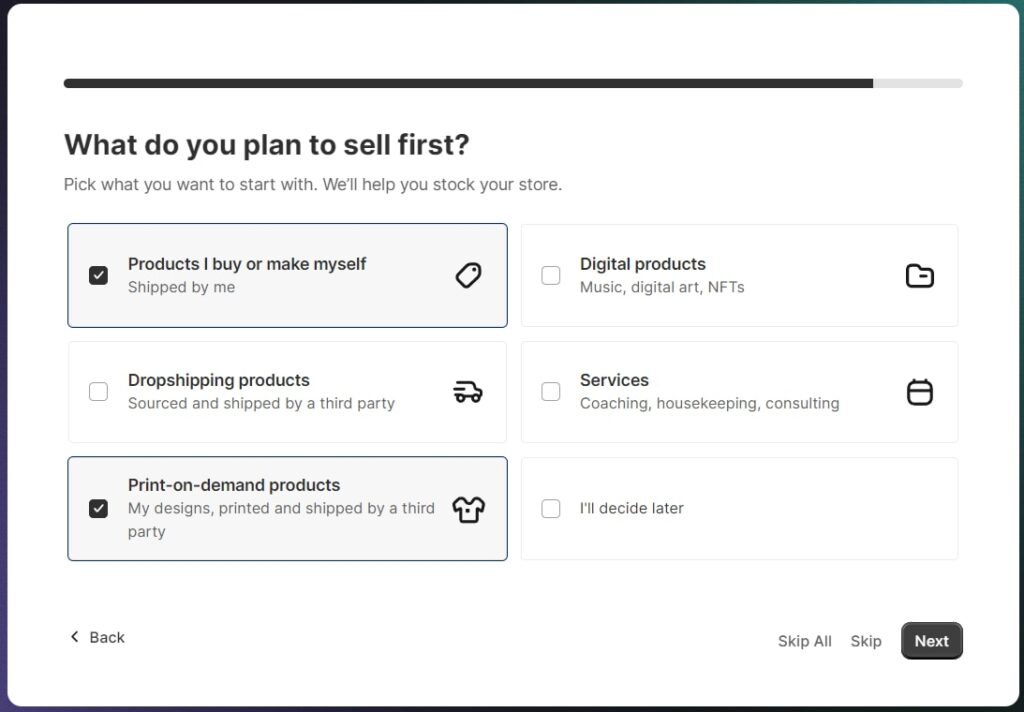
- Choose where you like to sell. You can select more than one option and always edit it.
- Select what products you want to select.
- Set your location and create your account using your email address.
Step 2: Customize Your Store
You need to make sure your online store looks professional before starting to sell. This way, visitors can trust you and start buying products. Luckily, Shopify provides everything you need to set and customize your store. Let’s see how to start a successful Shopify store using these tools.
Choose Your Store Name
Who can trust an online store that doesn’t even have a name? The first step in growing your online business is choosing a unique name that represents what you offer. To choose your store name, keep these tips in mind:
- Avoid lengthy names and select something easy to remember.
- Check that the name is not similar to your competitors.
- Make sure your name is web-friendly since it appears on your domain.
- Choose a name relevant to your service.
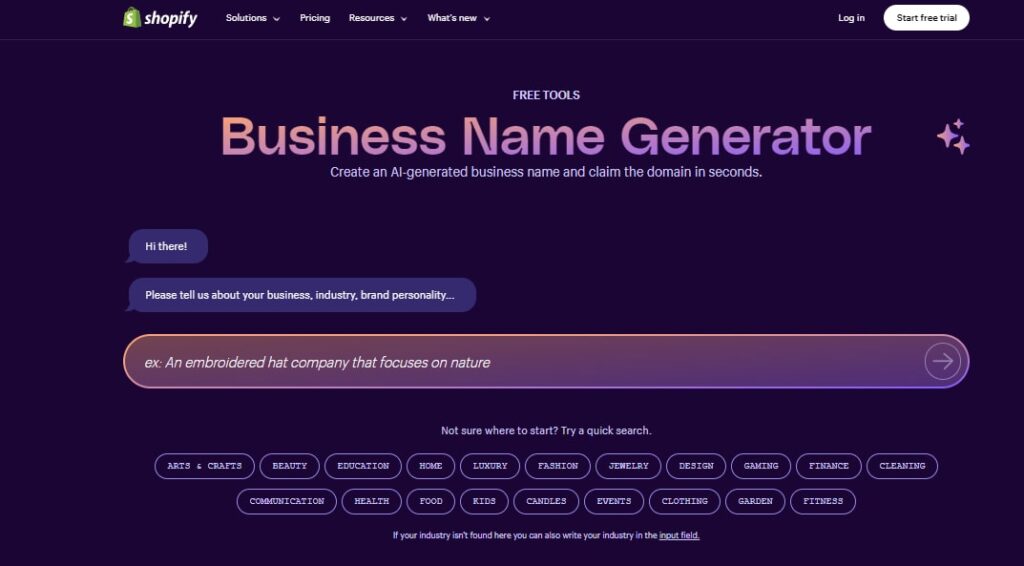
- Get help from name generators. Shopify itself provides a free name generator that you can see on its website.
Create A Logo
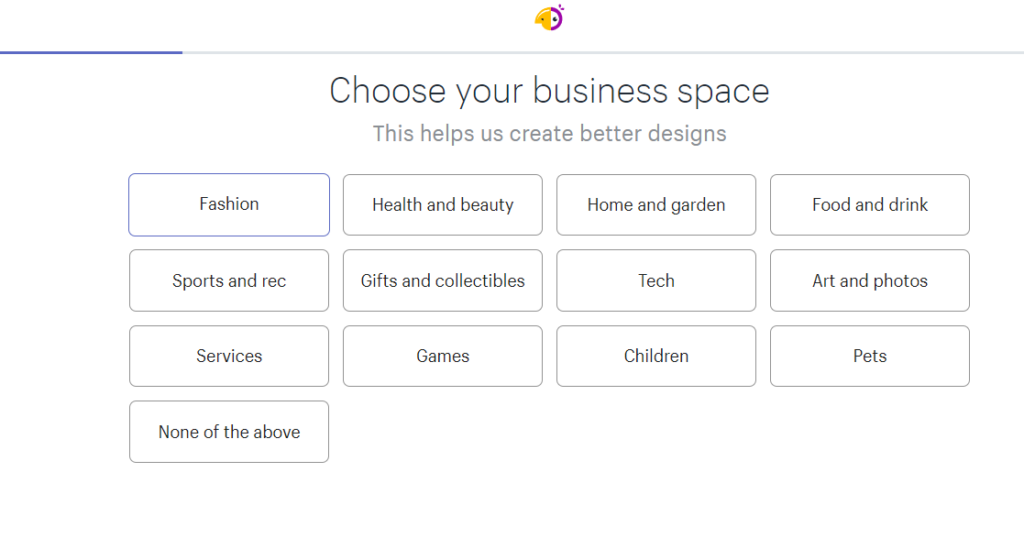
Having a brand logo makes your store memorable, and customers can easily recognize your name. It can be your brand name or something that describes it. The good news is that Shopify provides a free logo designer tool you can use for your store. Here is how to start a Shopify store and use the free Logo designer tool:
- Log into your Shopify account and tap the ‘My Store’ icon in the top right corner.
- Click on the ‘Setup your online store’ icon.
- Under the ‘Create a professional logo’ section, click ‘Create a logo’.
- Follow the onscreen instructions to describe your brand.
- After a few seconds, Shopify will suggest different designs that you can use,
- You can also edit the colors or fonts to make whatever you want.
Choose A Theme
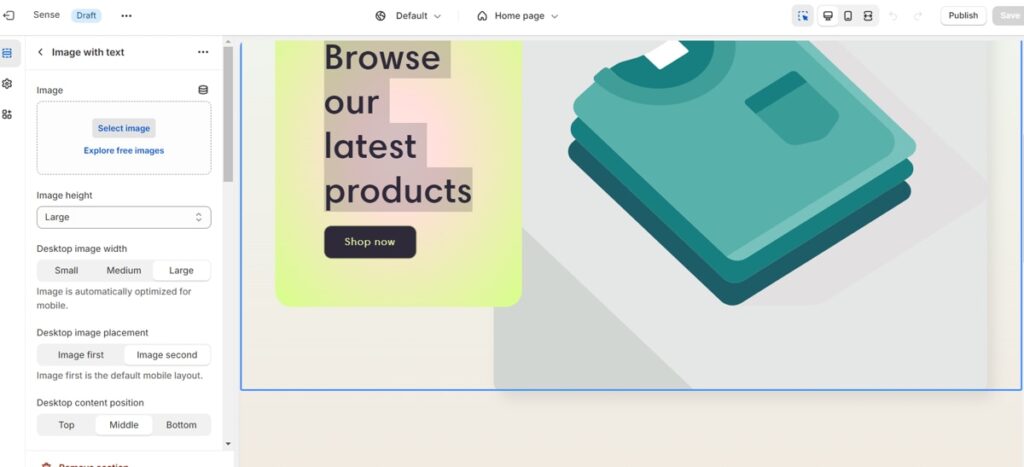
Now, it’s time to create the look of your online store. Shopify provides many free and premium themes to choose from. You can customize different blocks and buttons, design landing pages, add titles to your homepage, etc. Here is how to start a Shopify store and choose your store theme:
- Start by going to your ‘My Store’ setting.
- Click on the ‘Setup your online store’ icon.
- Select ‘Customize theme.’
- Scroll through different themes and choose the one you like.
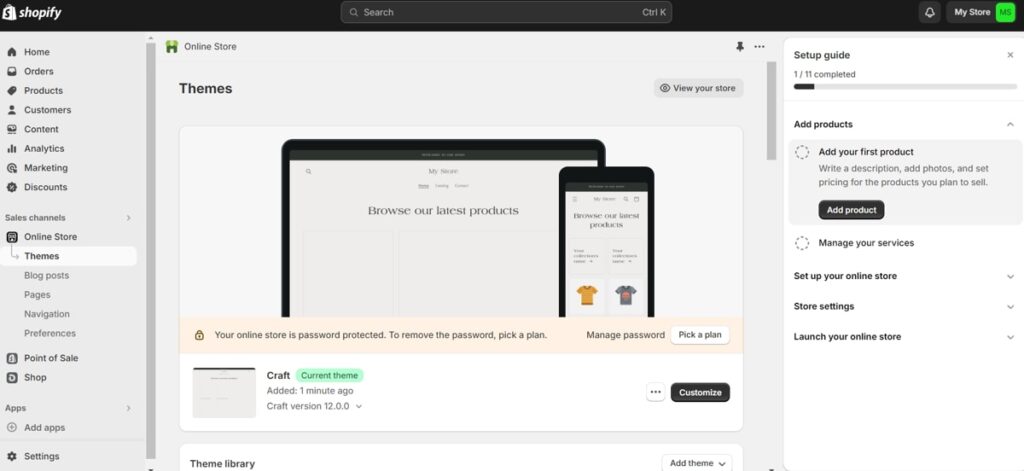
- Now, it’s time to add your personal taste. Click on the ‘Customize’ option.
- You can easily change the font of texts, write headings for your store pages, edit the color palette, add blocks, etc.
- Once you are done, tap on the ‘Publish’ button.
Step 3: Add Your Products
You can’t find out how to start a Shopify store without adding your products. Once you are done with designing your store, it’s time to add your products and start selling. Tap your account’s ‘My store’ icon and select ‘Add products’. Here is how to start a successful Shopify store by adding your selling products:
- On the opened page, you need to add your items individually.
- Add a title (name of the item) and a description for each product.
- Add a picture of the products, and make sure it’s high-quality and has a simple background.
- Next, add the price. You can use the ‘Compare-at-price’ feature to add the real price and discount on discounted items.
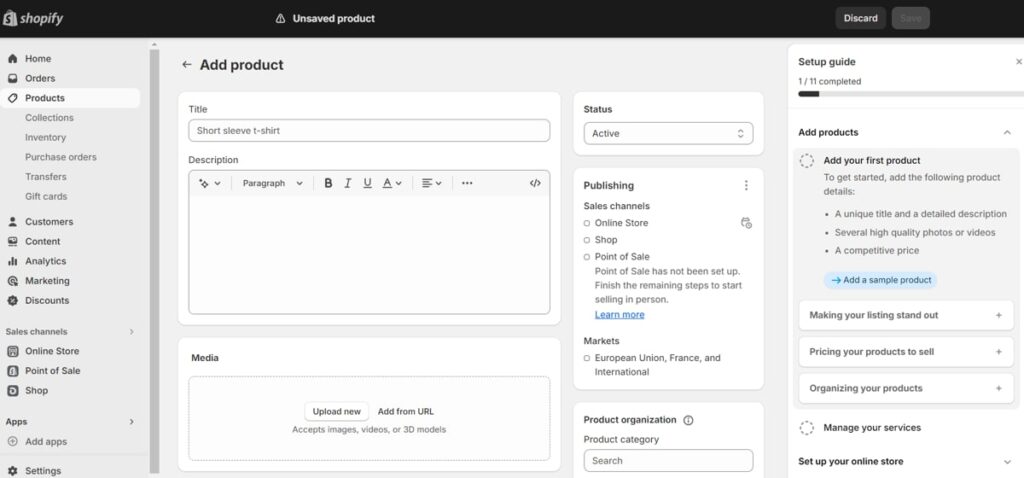
- Then, you can add the quantity, so customers can’t order the item once it’s sold out.
- Finally, add the shipping cost and other details and save the product.
- Repeat the same steps for every item you want to sell.
Pro Tip: The product description is not only for giving information about the item. By using keywords and writing SEO-friendly text, you can increase your chance of appearing on Google searches.
Step 4: Set up The Shopify Payment
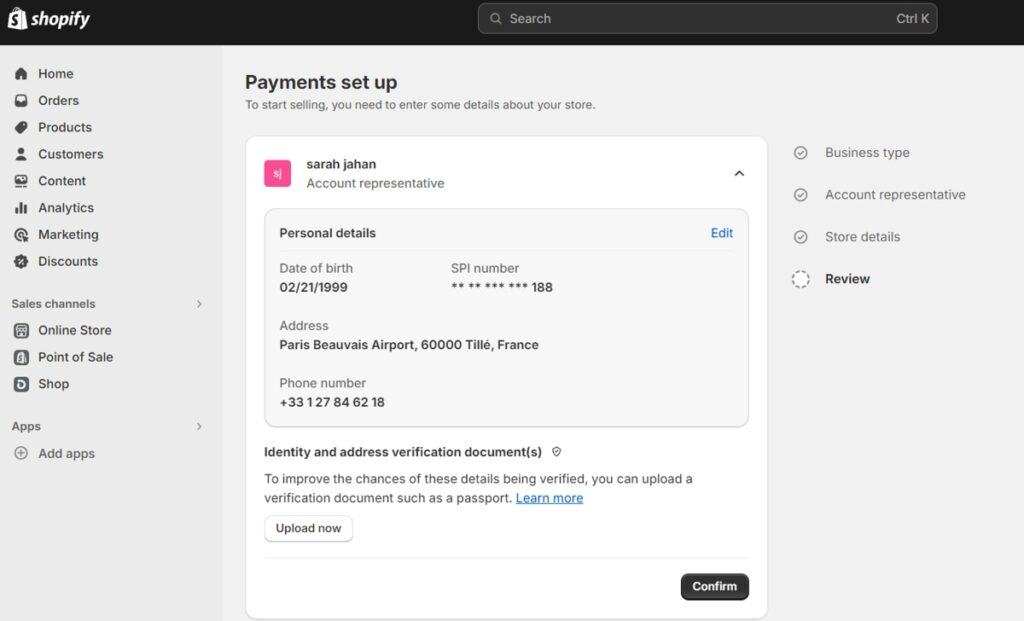
The next step might take time, but it’s essential in the ‘How to start a Shopify store’ guide. To start online marketing, you must provide detailed information about yourself. You may also need to upload a copy of a document to verify your identity and address. Here is the information you need to provide:
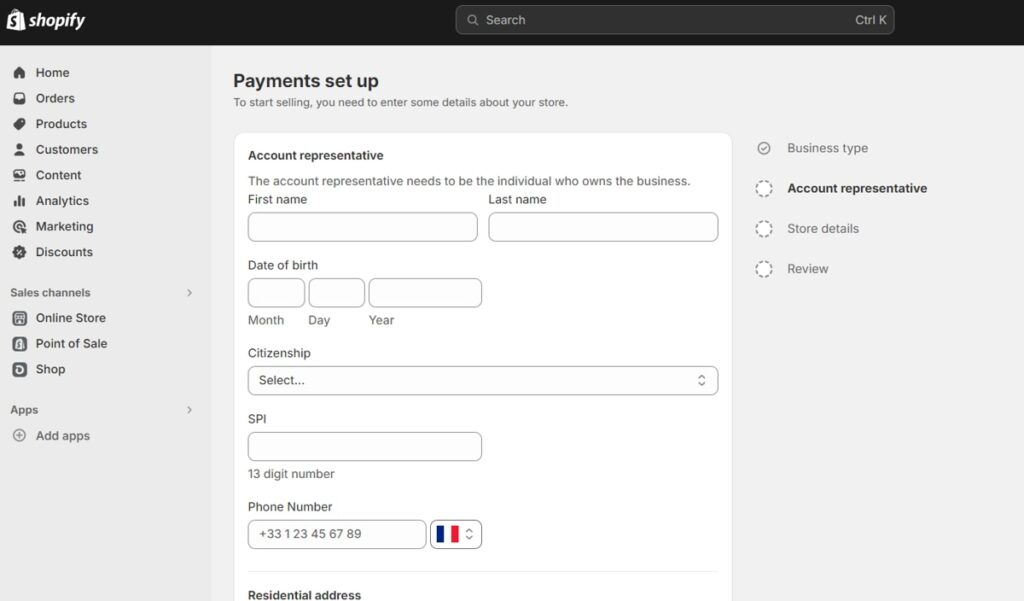
- First and last name,
- Date of birth,
- Citizenship,
- SPI,
- Phone number,
- Address and Postal code.
Then, you need to add some information about the store, such as the Store phone number and category, and upload the required documents. After a few days, you will receive an email about getting verified.
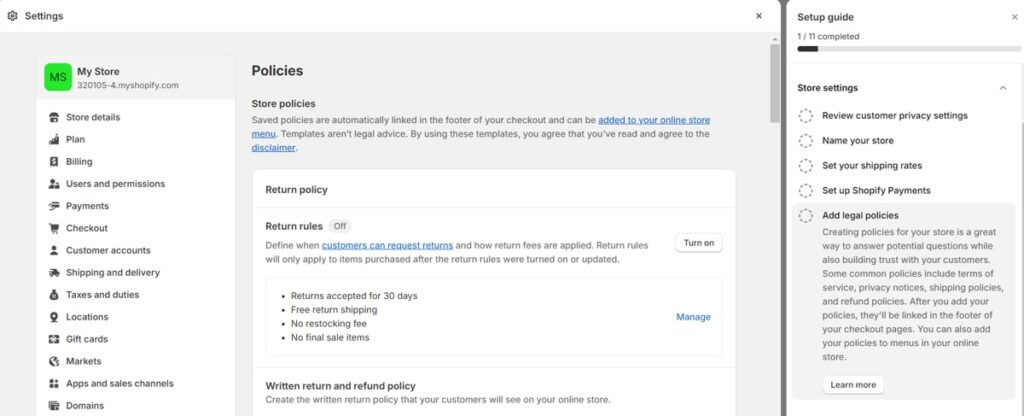
Step 5: Add Store Policies
One of the best ways to build trust with your customers is by creating policies for your store to answer potential questions. In the next step of how to start a Shopify drop-shipping store, you need to write terms of service, privacy notices, shipping policies, and refund policies.
- Return and refund policy
- Privacy policy
- Terms of service
- Contact information
Step 6: Place A Test Order
In the previous parts, we showed you how to start a Shopify drop-shipping store. To make sure that your checkout process and settings work well, it’s better to make a test order before launching your store. On Shopify, you can
- Place a test order by simulating a transaction.
- Place a test order with a real transaction and cancel the order immediately.
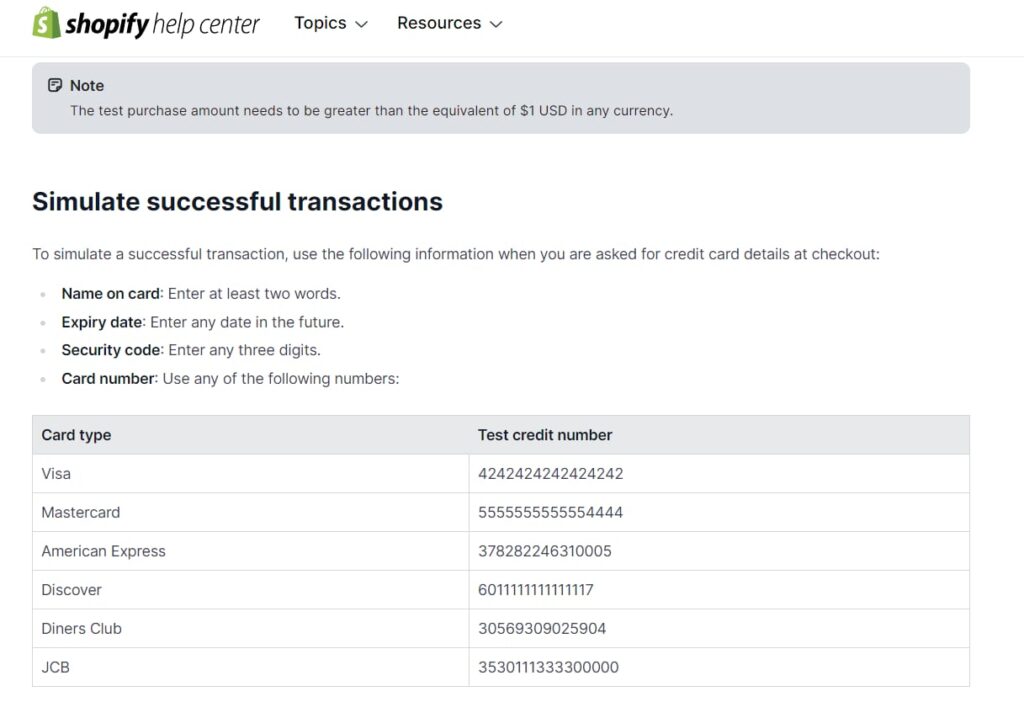
Once you are done with the previous steps, your store is all set, and you can follow the below instructions to place your test:
- From your Shopify admin, go to Settings and choose ‘Payments.’
- In the ‘Shopify Payments’ section, click ‘Manage.’
- In the Test mode section, select ‘Enable test mode.
- Click Save.
Step 7: Check Some Examples
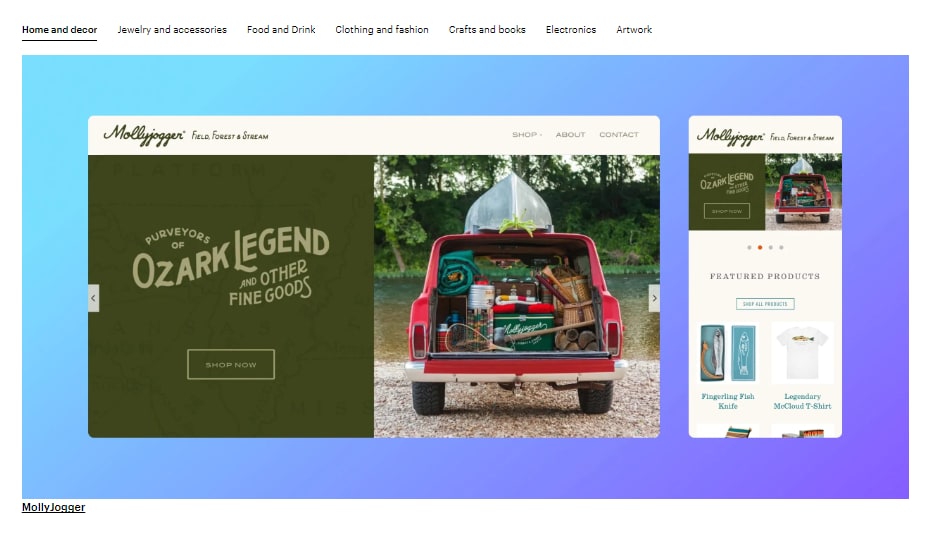
Up to this point, we have reviewed how to start a store on Shopify together. Even though you are all set to launch your store, we recommend you check some examples to better understand what else you can include in your store.
On the Shopify website, scroll to the bottom and select ‘Store Examples. Here, you can check many successful stores that get thousands of leads monthly. Make sure to check their different pages and also pay attention to their payment process.
Step 8: Launch Your Store
To access the launch feature for your website, you need to upgrade your plan from free to one of the premium packages based on your needs. So, if you are using the free trial to learn how to start a Shopify store, make sure to upgrade your plan from your account’s settings.
After choosing the plan, set your domain, and done! You can launch your store by going to your ‘My Store’ tab and selecting ‘Launch My Store’ in a few seconds.
How Much Does It Cost To Start A Shopify Store?
By creating an account on Shopify, you can use a 3-day free trial. Then, you can use the newbie’s offer and the premium package by only paying $1 monthly for the next 3 months. After that, you need to purchase one of their plans, and here is the pricing:
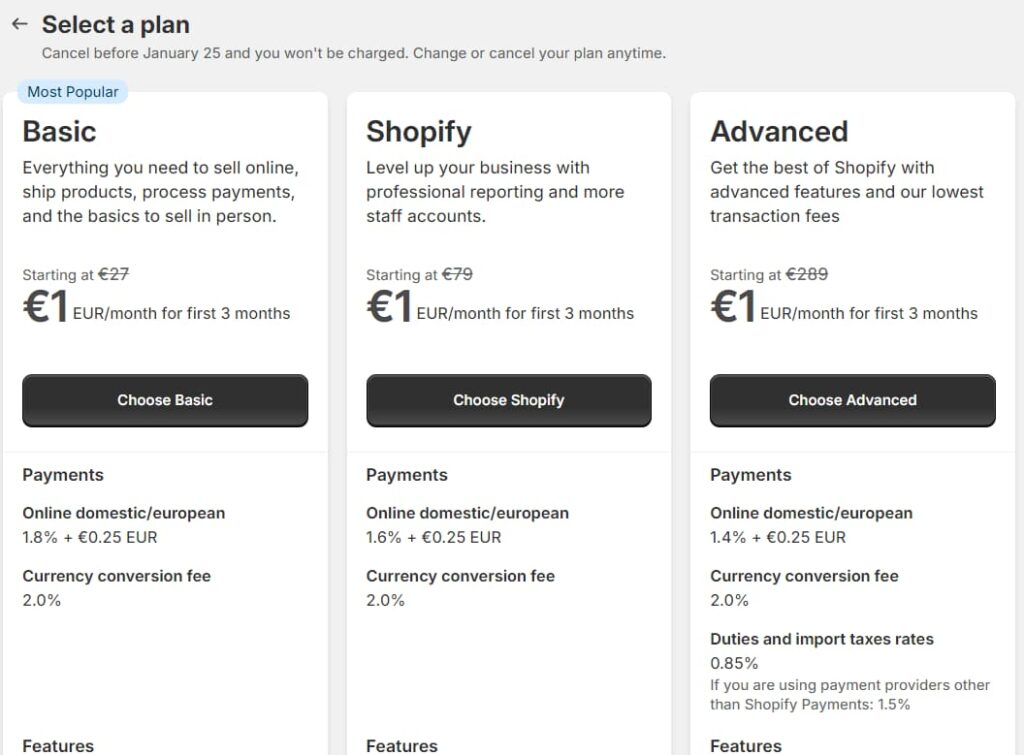
Basic: $27/m
- 2 staff members
- Up to 1,000 locations
- Basic reports
- Currency conversion fee: 2.0%
- Online domestic/European: 1.8% + EUR 0.25
Shopify: $79/m
- 5 staff members
- Up to 1,000 locations
- Professional reports
- Currency conversion fee: 2.0%
- Online domestic/European: 1.6% + EUR 0.25
Advanced: $289/m
- 15 staff members
- Up to 1,000 locations
- Advanced report builder
- Professional reports
- International pricing
- Online domestic/European: 1.4% + EUR 0.25
- Duties and import taxes rates: 0.85%
Conclusion
In conclusion, starting a successful Shopify store requires a bit of effort and patience, but it is achievable. By following the step-by-step guide on starting a Shopify store provided in this article, beginners can easily create their own online store and start selling products. Make sure to check some examples and start your Shopify store today!
FAQs:
On the Shopify terms of service, the platform clearly states that you need to be at least 18 to open an account. But how do you start a Shopify store for those under 18? In this case, you can ask your parents to help you create and manage your online store until you are 18.
So in the payment section, you need to give your parents’ banking information, and your income will affect your parents’ taxes.
You can try different methods to have multiple stores on Shopify:
Create a new store with a separate email address and follow the same steps of how to start a Shopify store.
Use the same email address, but create a second website for your second store. Shopify allows you to create up to 10 stores with the same email address. Each of these stores has its own domains, products, and themes. 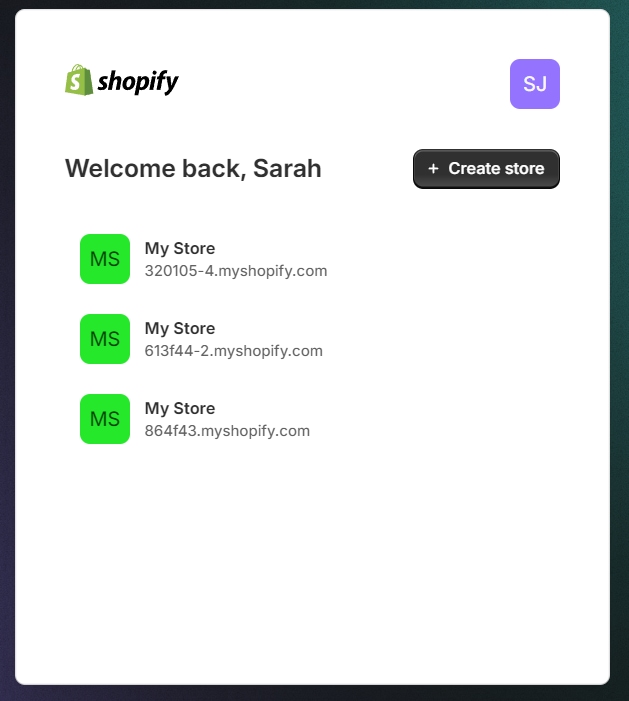
Unfortunately, you can only use Shopify for free for three days. But by spending only $1 per month for the first 3 months, you can start your Shopify store. So, while there is no way to use this service for free, you can invest in your online store for a reasonable price.


![Read more about the article How to Become a Fashion Nova Ambassador: [The Ultimate Guide + Best Alternative in 2024]](https://blog.ainfluencer.com/wp-content/uploads/2023/12/Fashion-Nova-ambassador-featured-1-300x182.jpg)


